💡 Note: Local editing is available with an Unlimited plan. With Pay-per-Picture, your photos are always edited on the Neurapix server.
Step 01 — Select images
In the Library view, select all the images you want to edit.
Step 02 — Open the dialog
Go to Library → Plug-in Extras → Edit photos.
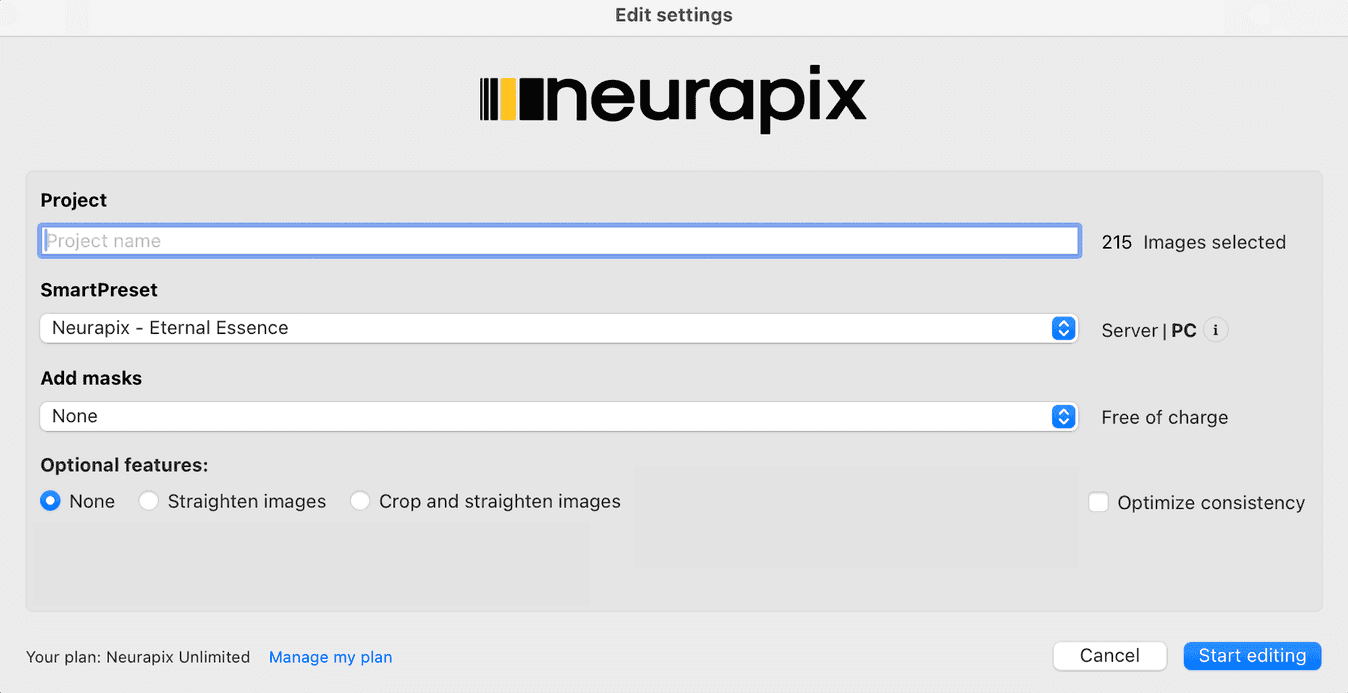
Step 03 — Set up the project & start
In the dialog that opens, enter a project name and choose your SmartPreset. Optionally add masks or enable features such as “Straighten” or “Crop and straighten”.
Then click “Start editing”.
💡 Tip: The first time you use a new SmartPreset it is downloaded once — this only takes a moment.
Step 04 — Editing in progress
Neurapix now applies your SmartPreset to all selected photos. The first results are visible within seconds; the remaining images keep processing in the background.

Start with 1.000 free AI edits.
Copyright © 2026 Neurapix GmbH. All rights reserved.